GROWING VEGETABLES
How To Grow Sacks Full Of Potatoes – 7 Weird Ways That Really Work
Strangely, potatoes sometimes seem to get overlooked when it comes to growing a vegetable garden. Apparently, some are under the impression that there’s really no reason to grow them as they’re fairly inexpensive to buy, and, after all, how much difference can there really be in taste?

Of course, there are many different ways to grow them too, some of which are rather unusual, but they really do work!
1. 100 Pounds of Potatoes in Just Four Square Feet
All you need for this technique is some lumber, seed potatoes, gardening soil, and plenty of love and care.
The recommended planting time is the early around April, and late around August 1st, and it takes about 3 months before harvest. A few tips for utilizing this technique include:
- Cut apart the larger seed potatoes, and make sure there are at least two eyes in each part you plant.
- Dust the cut pieces with first will help you seal the open ends from bacteria.
- Use 10-20-20 fertilizer and fertilize at planting and 2 other times during the season as well.
- Water in a way that you will keep the plants at an even level of moisture.
- Avoid planting in the same area in consecutive years.
- If you’re short on space, build a box and plant inside of it. You can add sides to the box as it grows, and then fill in the new space with soil or mulch. This way, you’ll be able to remove the bottom boards from the box and reach in carefully to pull out new potatoes.
2. Trash Bag Potatoes
Growing potatoes in a trash bag is practically a foolproof way to grow potatoes and it only takes a couple of easy steps to do it.
- One week before planting, put your seed potatoes in a warm spot. When sprouts that are about one-quarter-inch to one-half-inch form, they are ready to be planted. Cut big seed potatoes into chunks that are around 2 inches wide. Each piece should have at least 2 sprouts. After this, allow them to sit at room temperature for 3 days.
- Use a pair of scissors to make a few drainage holes in the bottom of a 30-gallon plastic trash bag. Roll the sides of the bag down and fill it with about one-third potting soil. Then, you will be able to put the trash bag in an area of your garden that gets full sunlight.
- To plant the potato seeds first, dust them with agricultural sulfur to protect them against fungal disease. Plant them by burying them with the eyes pointed up about two inches deep in the soil. Water thoroughly.
- When your potato plants are 6 to 8 inches tall, add more soil and straw to the bag. As they continue to grow, keep unrolling the trash bag and adding more soil accordingly.
- Now comes the fun part: harvesting time. Your potatoes are ready for harvesting when the leaves turn yellow and the foliage dies back. At this point, you should stop watering and simply leave them alone for a few weeks so that the skins toughen up. To harvest, slit open the side of the bag and release the potatoes.

3. Commercial Grow Bags
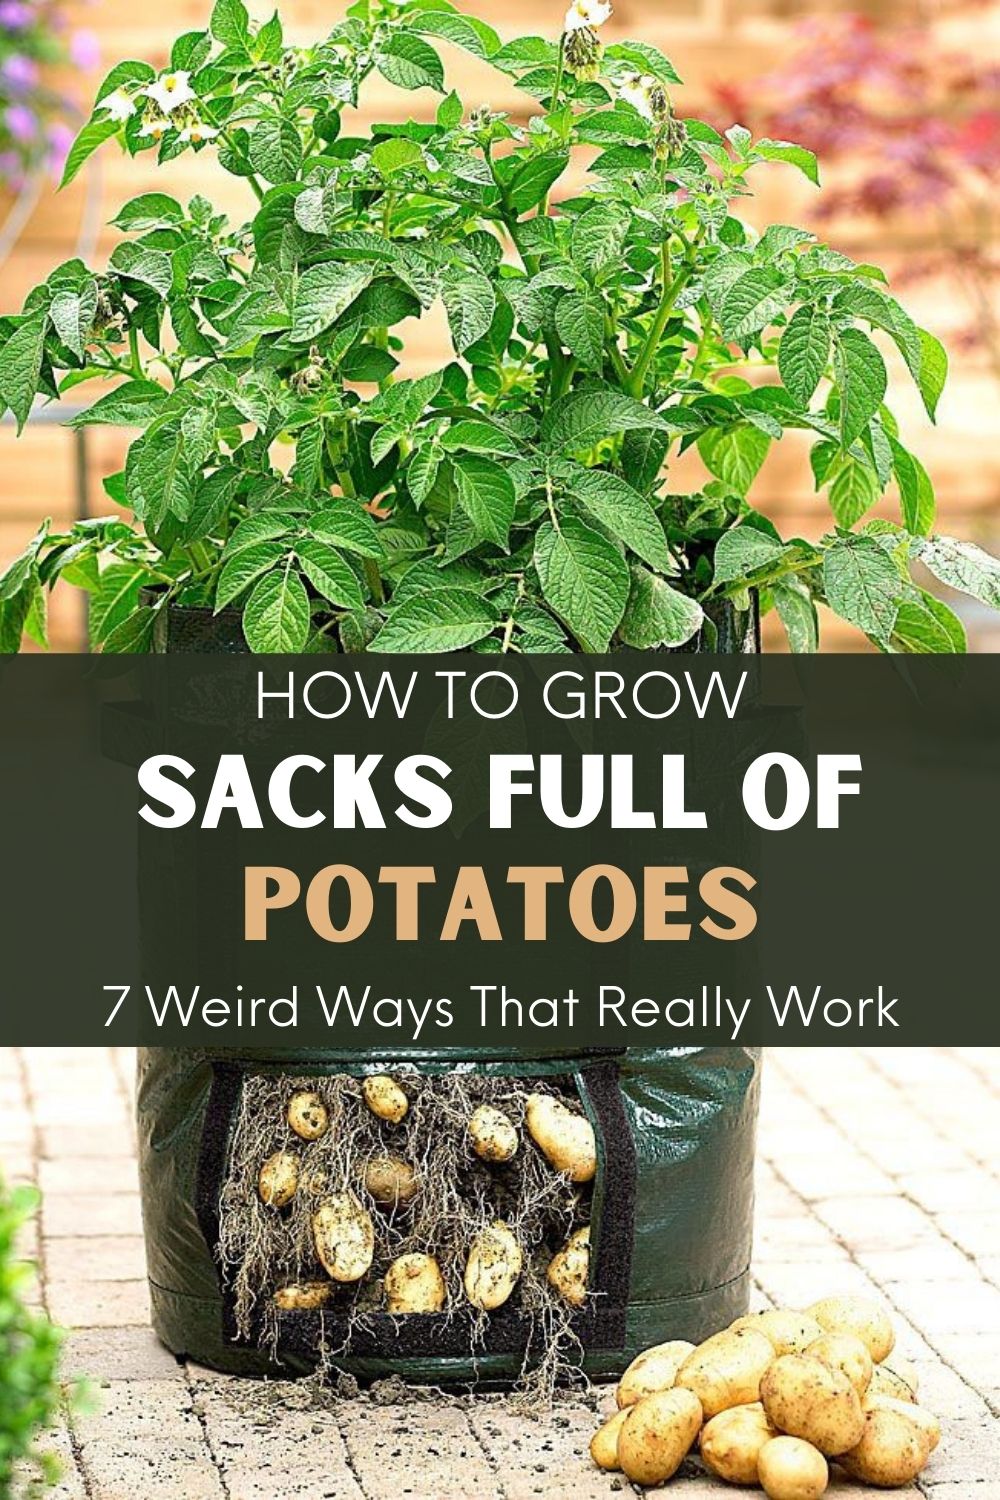
You can also use commercial grow bags, which are made from heavy, dense polypropylene. While they are a little more expensive than trash bags, they typically last for several growing seasons.
To use them, just place a few inches of a soil-compost mixture in the bottom of a bag, then plant four seed potato pieces. Cover them up with three inches of soil. Continue adding soil as the potato plants grow until the bag is completely filled. To harvest, all you have to do is turn the bag on its side and dump out the contents. Considering the relatively small space, the yield is usually quite impressive.
4. Planting In The Ground With Straw Mulch
This method is one of the easiest around if you’ve got some room in your garden. All you have to do is place your seed potatoes on the surface of prepared garden soil, about eight to twelve inches apart. Then, cover them with 3 to 4 inches of loose straw. Once the stems grow to about eight inches tall, add a little more straw. Continue to do so until the plants are around three feet high and you’ve got a layer of at least one foot of depth.
5. Bucket Potatoes
First, gather your supplies:
- A bucket (preferably a 5-gallon bucket)
- Small rocks or pebbles (aquarium pebbles work well)
- Potting soil
- A black trash bag
- Seed potatoes
- First, add the rocks or pebbles to the bottom of your bucket to allow for drainage. Cover the bottom with around one to two inches to ensure proper drainage.
- Fit your trash bag to the bucket by opening it up and placing it inside.Cut it in order to achieve about a one-inch overhang. Using your scissors, make a cut to mark it and then lay the trash bag across the floor. Cut a straight line out of the bag and then put it back inside the bucket. Poke out about 20 drainage holes.
- Add about four to five inches of potting soil to the bottom of your bucket, after the trash bag has been put into it.
- Then, add your potatoes by placing three in the bucket on top of the soil.
- They need big amounts of water, so make sure to keep them well-watered, and it won’t be long before you’ve got a crop of potatoes.
- When the leaves start to yellow and the foliage begins to die back, it’s harvest time!
6. Wire Cage
All you need is:
- A 10-foot-long piece of wire stock fence or similar sturdy wire fence
- Seed potatoes
- Fertilizer
- Cut your fence into a 10-foot-long piece and then roll it into a cylinder that’s around 3 feet wide. Fasten the end to the fence using wire to keep it together.
- Before you plant, get your soil prepared by loosening it up and adding a little fertilizer, which gets your potatoes off to a good start.
- Plant your seed potatoes like you normally would.
- Now, put your wire hoops so that they stand upright. Set them up around the seed potatoes you’ve planted,and keep them centered.
- When your potato plants begin to sprout, fill in the space inside your fence with straw, add more soil and leaves. Make sure that you don’t bury your plants, the soil should only be brought up about two to three inches inside the cylinder.
- When your potato shoots are about a foot tall, cover them up completely with straw, leaves or another similar type of material.
- As your plants grow, continue to fill up your cylinder as they’ll use the extra soil to grow more potatoes. Remember, they need lots of water – enough to soak them thoroughly, but not so much that it drowns them.
7. Potato Tire Tower
All you need is soil, seed potatoes, and tires.
- Lay a tire down in an area that gets at least seven hours of sunlight every day. Fill up the interior with garden soil to the upper rim.
- Cut 2 seed potatoes into thirds, and make sure that every piece has a few eyes on it. Plant those pieces around the edge of the tire’s interior with their eyes facing up.
- Place another tire on top of that, and as your potato plants grow, add soil to that tire’s interior.Cover your plants with soil.
- When your potato plants reach the top of the second tire, it’s time to add another tire. Continue adding soil to cover all but the top 4 or 5 leaves of the plants.
- If you want, you can add a fourth tire and continue as before.
- As with the other methods, your potatoes can be harvested when the leaves begin to yellow and the foliage dies off.

If you want to find more natural remedies, take a look at the Everyday Root Book!
With 350+ pages, you will be able to replace all of the toxic products and medications in your home with healthier, all-natural alternatives.
You will be confident in knowing exactly what is in the products your family uses and happy with the money you will save every month.
In addition, they offer you three more bonuses + 75% discount only this month!
GET THE EVERYDAY ROOTS BOOK NOW!
Included in this life changing book are:
- 105+ NATURAL HOME REMEDIES – Treat almost any illness with natural ingredients you probably already have in your kitchen.
- 75+ NATURAL BEAUTY RECIPES -Get the best hair and skin you’ve ever had and look younger with these insanely clever natural beauty recipes.
- 35+ DYI HOUSEHOLD PRODUCTS & CLEANERS – Never Buy Toxic Cleaning products again! Save a fortune and your families health with these super simple homemade cleaning products that work better than the chemical ones.


